Address Book
Table of Contents
- 1. Use Cases — 3 common scenarios
- 2. Features — Search & Filter / List Columns / Import & Export
- 3. FAQ — FAQ + Notices
- 4. Related Features
1. Use Cases
Quick links: Auto-fill recipient data on order import | Reusing fixed delivery points | Grouping addresses by channel
Scenario 1: Auto-filling recipient data when importing large batches of orders
Situation: Every day you import orders from your channel back-offices or your own system into GoWarehouse. Many of them ship to fixed delivery points (stores, dealers, company warehouses), and each row forces you to fill in a full set of recipient name, phone, and address — lots of fields, easy to mistype.
Use this feature: Build those fixed delivery points into the address book first, giving each a memorable Code (see Add Address). When you later import orders, the file only needs the Code; the system matches it against the address book and auto-fills that address's recipient, phone, and full address, so you never retype them per order.
Result: Your import files become much leaner, recipient data comes from a single proofread address book, and shipping-address errors and returns drop noticeably.
Scenario 2: Reusing a handful of fixed delivery points
Situation: Most of your shipments go to consumers, but a set of fixed addresses come up again and again — a partner store you restock weekly, a returns consolidation warehouse, an overseas forwarding warehouse — and you retype the same address every time you create an order.
Use this feature: Add these fixed addresses to the address book and select them by Code when creating an order; the system auto-fills the full recipient details. When an address moves or a phone number changes, edit it once on Edit Address, and all future orders use the updated data.
Result: Each fixed delivery point needs only one correct record, order creation speeds up, and you avoid the address inconsistencies that come from different people typing it independently.
Scenario 3: Grouping frequently-used addresses by channel
Situation: You run multiple sales channels (Shopee, momo, your own site, etc.), and different channels often map to different returns warehouses or consolidation points. Amid many addresses, your team can't tell at a glance which one belongs to which channel.
Use this feature: When creating or editing an address, set the Default Merchant Channel on Add Address to mark the channel it mainly serves. The address book list shows the channel as a tag, and you can filter by channel.
Result: You quickly find the right address per channel, multi-channel address management becomes more organized, and the chance of picking the wrong address goes down.
2. Features
The address book centralizes your frequently-used recipient addresses — stores, dealers, returns warehouses, and other fixed delivery points. Once added, each address has its own Code, which you can select quickly when creating an order, or use to auto-fill complete recipient data when importing orders, saving repeated typing and reducing errors. This page is the entry point to the address book, where you can search, filter, add, import, and export all addresses.
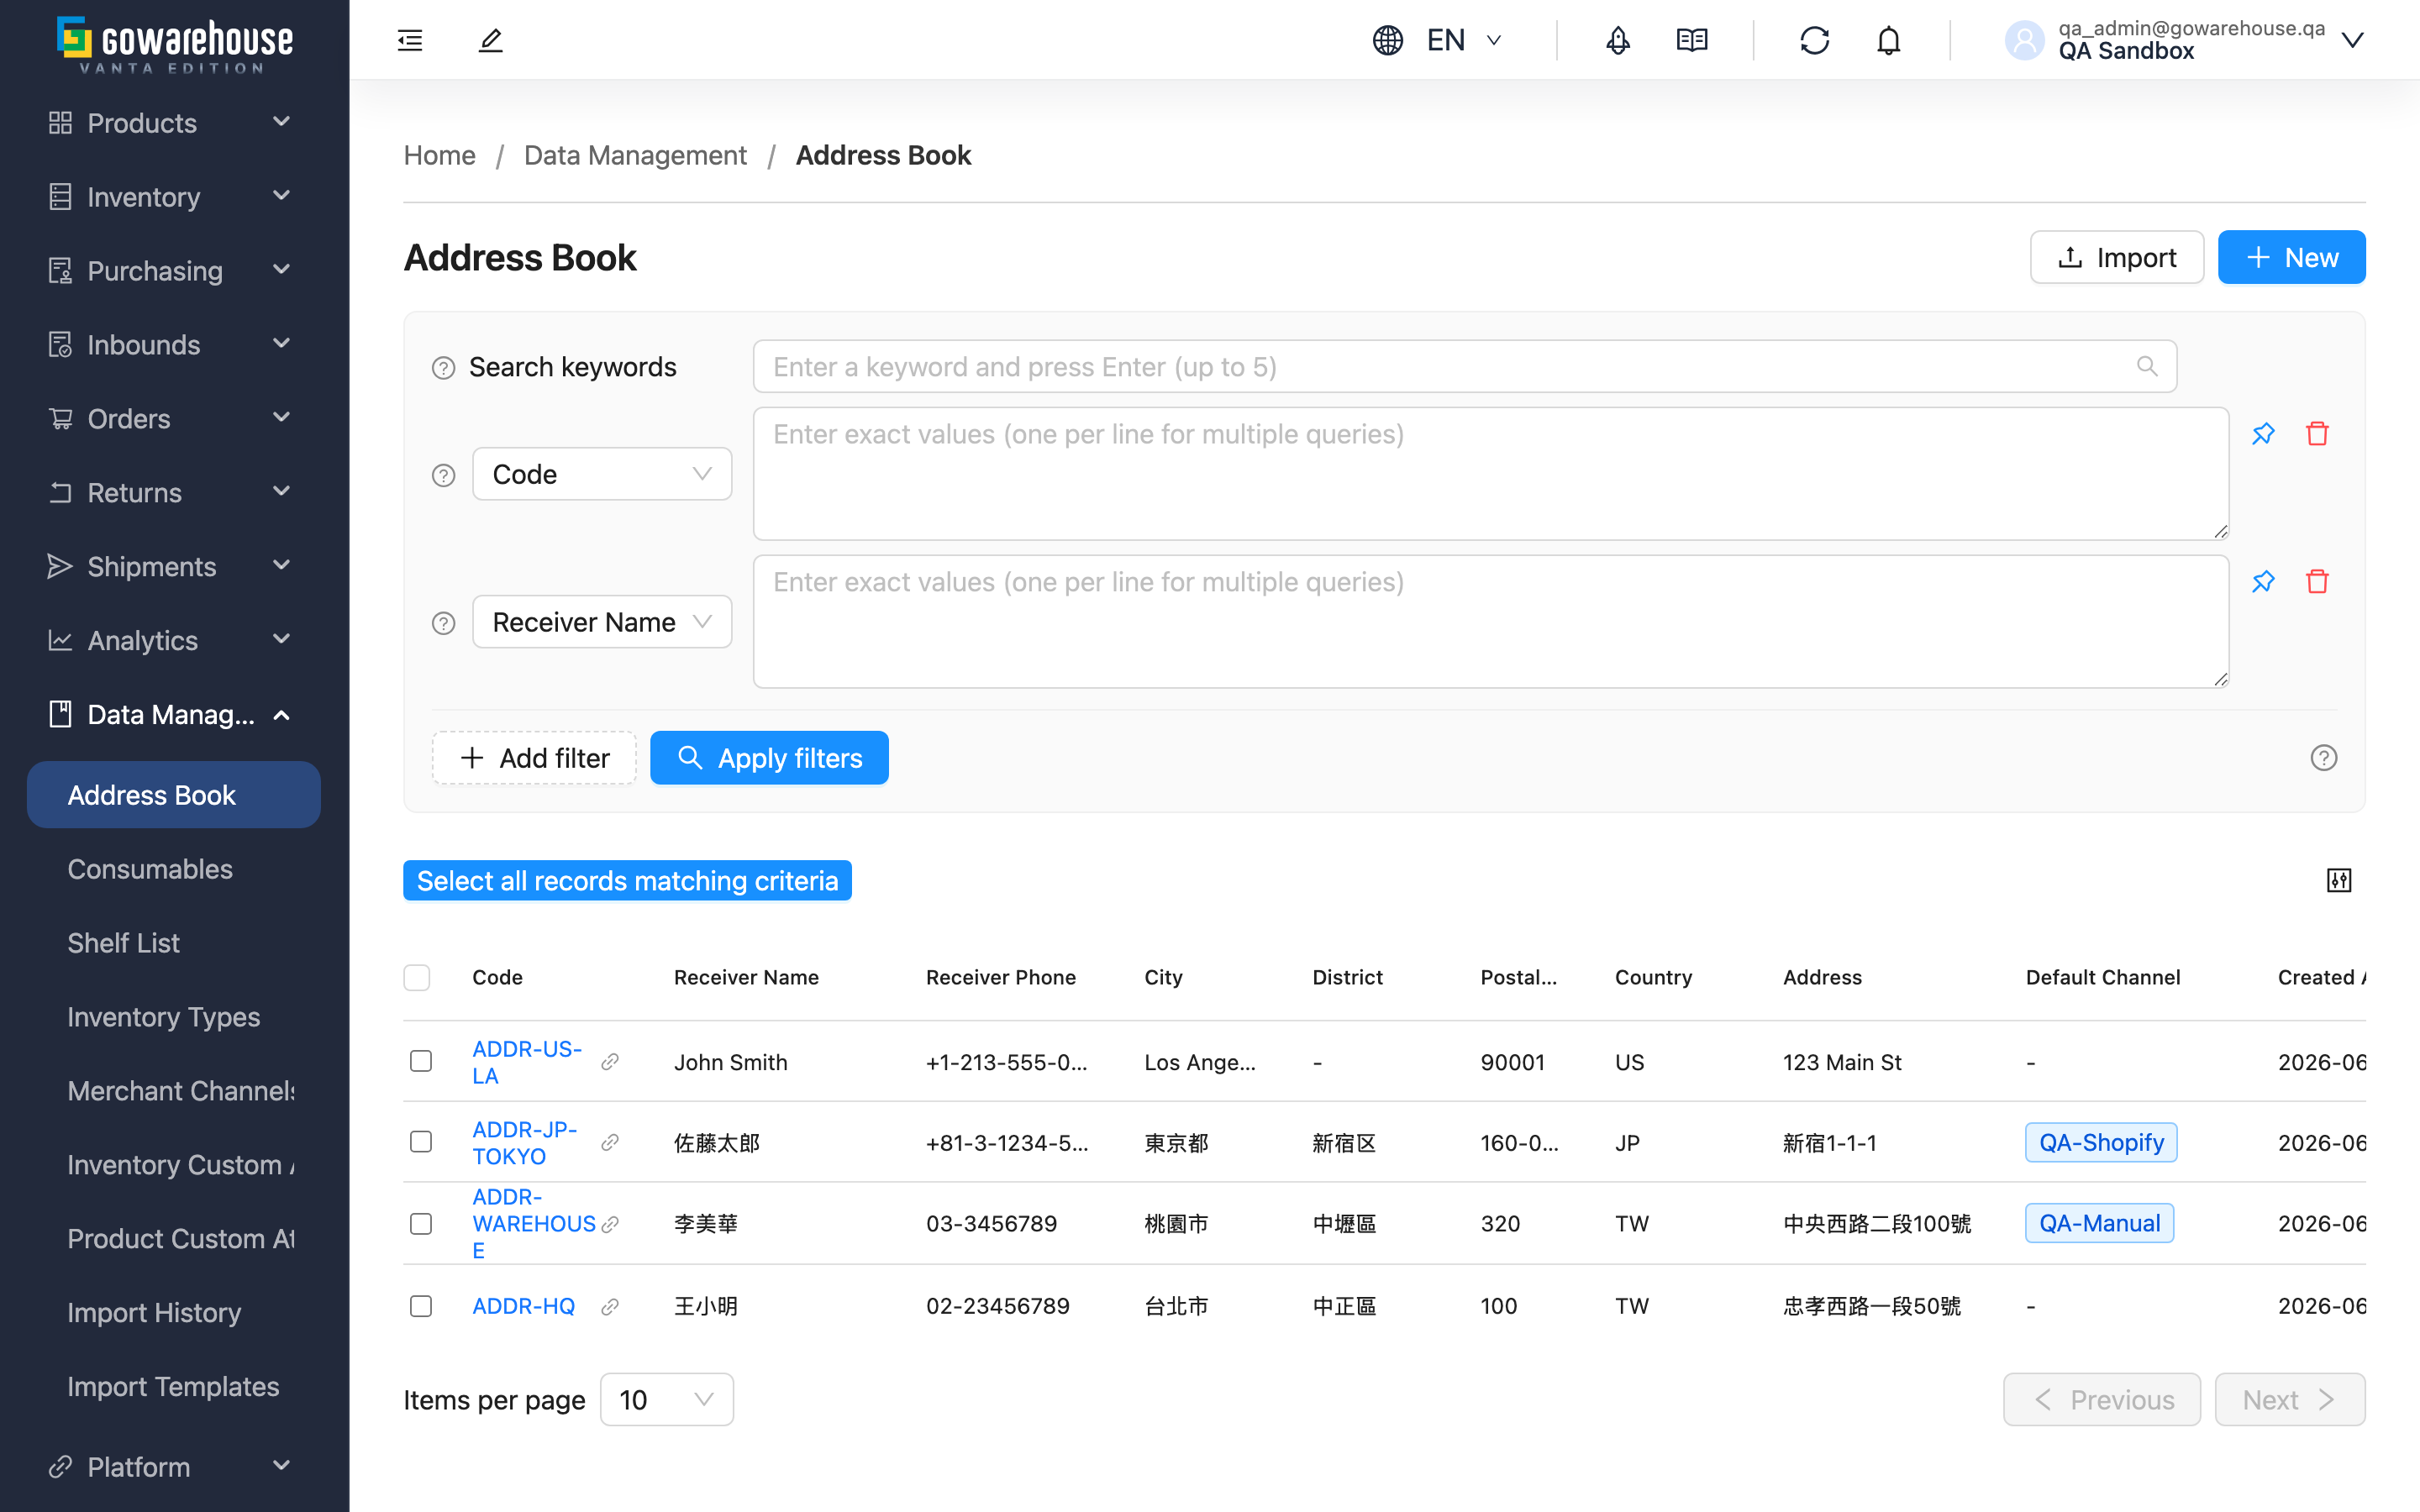
Quick links: Search & Filter | List Columns | Import & Export
2.1 Search & Filter
The search box at the top of the list matches Code, Receiver Name, Receiver Phone, and Address at once. For more precision, use the filter conditions; most support entering multiple values at once (one per line):
| Filter | How to use |
|---|---|
| Code | Enter one or more codes to find specific addresses |
| Default Merchant Channel | Pick a channel from the list to show addresses marked for it |
| Country | When managing overseas addresses, narrow results by country |
For the rest (Receiver Name, Receiver Phone, City), just type the value.
2.2 List Columns
Click the Code to open the Address Book Details; the link icon beside it opens the details in a new tab. Most columns are self-explanatory; only those needing a note are listed:
| Column | Notes |
|---|---|
| Country | Filled only for overseas addresses; usually empty for domestic ones |
| Default Merchant Channel | Shown as a blue tag; left empty when not set |
2.3 Import & Export
To create many addresses at once, use "Import" at the top right: in the dialog, first "Download Template" to get the template, fill it in, and upload. Import rules:
- Every row requires Code, Receiver Name, Receiver Phone, and Address; missing any one fails that row.
- The Code must not repeat within the same file, or it is rejected.
- If a Code in the file already exists in the address book: without "Override existing data" the row is rejected; with it checked, the existing address is updated from the file content.
- Country accepts forms like "Japan", "日本", or "JPN"; the system maps them automatically. Unmatched values are left blank without failing the row.
After submitting an import, go to "Import History" to view the per-row success and failure results.
To export, select the addresses to export and click "Export"; when done, go to "Import History" to download the file.
3. FAQ
3.1 FAQ
▪ During order import, how does the Code fill in the address?
In the order import file you enter a Code; the system matches the address with the same code in your address book and pulls that address's recipient, phone, and full address into the order, so you don't refill the recipient fields on every order.
▪ Any naming suggestions for the Code?
Use a combination of letters, digits, and hyphens, e.g. STORE-TP-01 (Taipei store 1), WH-TC-MAIN (Taichung main warehouse), RETURN-A (returns address A). Avoid special symbols that complicate matching across systems, so order import matches reliably.
▪ Can the same Code be repeated?
During import, the Code is matched both within the same file and against existing addresses: duplicate codes are rejected, or updated onto the existing address when "Override existing data" is checked. We suggest searching the list to confirm the code is unused before naming it.
▪ What is the Default Merchant Channel for?
It's an optional marker that helps you filter by channel in the list to quickly find addresses commonly used by a channel. Shared addresses can be left without one.
▪ Why can't I find a channel when filtering by channel?
The Default Merchant Channel options come from the sales channels you have created. If one is missing, add it under sales channel settings first, then return to the address book.
▪ Where do I download the exported address file?
After clicking "Export", go to "Import History" to view and download the exported file.
3.2 Notices
⚠️ Important
- Checking "Override existing data" during import updates existing addresses with the same code using the file content; the original recipient, phone, address, etc. are replaced.
- Before changing a Code, confirm whether your order import files still match addresses by that code, or the matching will break.
💡 Tip: Add your fixed delivery points (stores, returns warehouses, dealers) to the address book with well-chosen codes first; then order imports only need the code to auto-fill the full address — the most effective way to reduce address errors.
4. Related Features
| Feature | Description | Link |
|---|---|---|
| Add Address | Create a new recipient address | Go |
| Address Book Details | View the full details of a single address | Go |
| Edit Address | Modify an existing address | Go |