
Product Detail
Table of Contents
I. Features
When you need to quickly confirm a product's complete information, the product detail page shows its basic data, barcodes and unit settings, along with the history of every data change. Whether you are verifying a barcode the warehouse scanned, confirming the temperature setting, or tracing who changed the data, you can find the answer on this page.
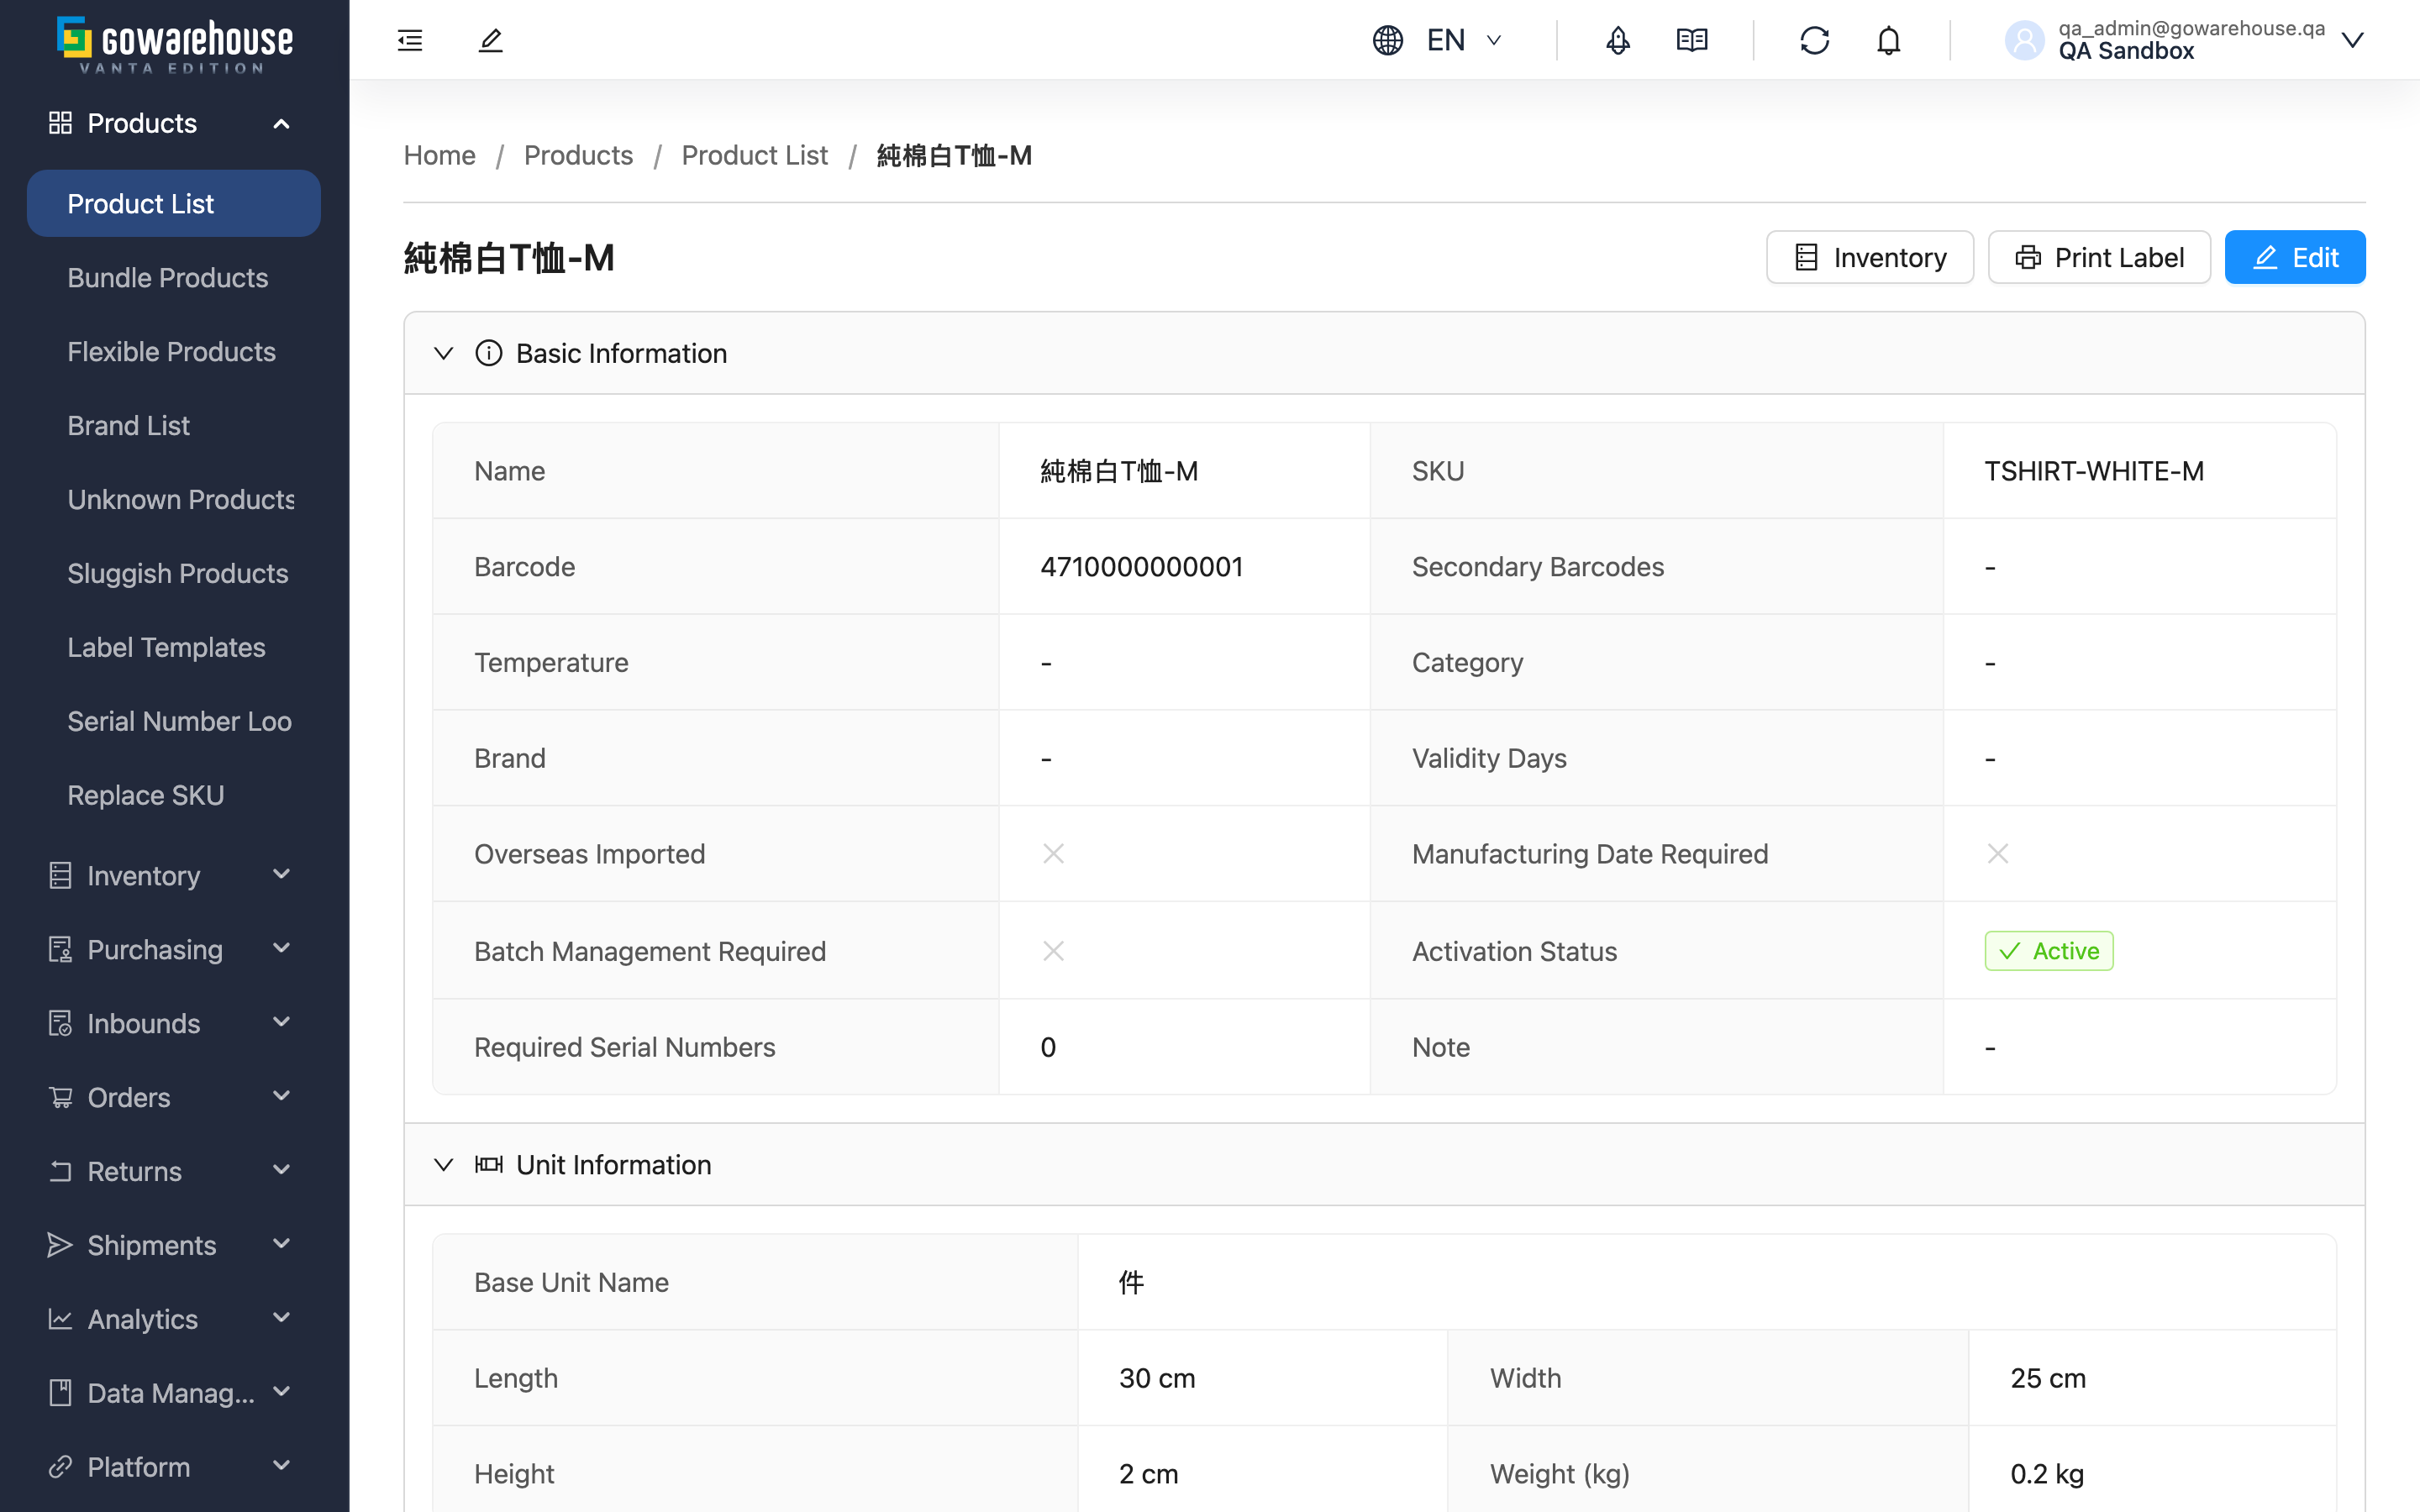
Quick Jump: Information Sections | Action Buttons
1.1 Information Sections
Basic Information
| Field | Description |
|---|---|
| Name | The name shown on orders and reports |
| SKU | The internal identifier you set for this product |
| Barcode | The main barcode used when the warehouse scans |
| Secondary Barcodes | Additional barcodes (there may be several, for different packaging or channels) |
| Temperature | The storage temperature this product requires (ambient/refrigerated/frozen, etc.) |
| Validity Days | Days from manufacture to expiry, used by the warehouse to calculate shelf life |
| Activation Status | "Active" or "Inactive"; inactive products cannot be used in new orders or inbounds |
| Required Serial Numbers | How many serial numbers must be scanned at shipping; when greater than 0, a "Shipping Serial Number List" button appears |
| Custom attributes | Attributes you created under "Data Management" → "Product Custom Attributes" are listed one by one |
The remaining fields (Category, Brand, Note, etc.) show the corresponding data by name. The product photo (if uploaded) is shown on the right side of the page.
Unit Information
Shows the product's unit and dimension settings: Base Unit Name, length/width/height, Weight (kg), plus the name, quantity-per-unit and barcode of the mid and large units, and the pallet stacking settings. The warehouse uses these to plan storage and packing.
Export Information
Shows customs-related data: Customs Declaration Name, Manufacturer Country (2-letter code), HS Code, Material.
Substitute Information
If substitutes are configured for this product, their names and SKUs are listed here.
Edit History and API Logs
Two tabs at the bottom of the page:
- Edit History: Lists every data change in chronological order, including who made it (your account, warehouse staff or a system integration) and the before/after value of each field.
- API Logs: Lists data-sync records between this product and external systems (e.g., e-commerce platforms). Webhook deliveries showing "Failed" or "Awaiting Retry" get a "Retry" button on the row so you can resend on the spot; the row turns to "Awaiting Retry" and the system resends in the background, and that row's delivery status and "Retries" refresh automatically within about ten seconds. If they haven't updated by then (the target timed out, or this attempt failed again and was queued for the next automatic backoff), reload the page to see the latest result. Both a manual resend and the system's next scheduled retry go to the webhook's current URL, so after you correct a wrong address, rows still sitting at "Awaiting Retry" switch to it on their own. Expand the row to see the address each attempt was actually sent to, which tells a target that never answered apart from one you were still calling at a retired address. If a webhook fails 10 times in a row the system deactivates it and notifies you; while it is deactivated none of its rows show this button — reactivate it on the webhook settings page (reactivating resets the consecutive-failure count) and the button comes back.The action requires the "Logs - Write" permission.
1.2 Action Buttons
| Button | Location | Description |
|---|---|---|
| Inventory | Top right | View every stock record of this product plus in-transit stock |
| Shipping Serial Number List | Top right | Look up the serial numbers registered at shipping (only shown when the product requires serial numbers) |
| Print Label | Top right | Choose a label template and copy count to generate a product label PDF |
| Edit | Top right | Opens the edit page to modify product data (shown based on your permissions) |
II. FAQ
2.1 FAQ
▪ Why can't I see the "Edit" button?
Possible reason:
- Your account does not have product editing permission
To get editing permission, contact your administrator.
▪ Where do I check stock quantities?
Click "Inventory" at the top right. The page lists every "In Stock" record of this product (inventory type, batch, quantity) plus "In Transit" stock with an inbound created but not yet arrived. If the quantity differs from what you expect, check for unfinished inbounds or contact the warehouse staff.
▪ Can I edit data directly on this page?
No. The detail page is read-only. To change anything, click the "Edit" button to open the edit page.
▪ Why are some fields empty?
A "-" means the field has not been filled in. Click "Edit" to open the edit page and add the data.
▪ How do I print product labels?
Click "Print Label" at the top right, choose a label template and enter the copy count, then click "Print Label" after checking the preview. Label templates are managed under "Products" → "Label Templates".
▪ How do I find out who changed the product data?
In the "Edit History" tab at the bottom of the page, every change lists the time, the person who made it, and the before/after value of each field, so you can trace where a change came from.
2.2 Notices
⚠️ Important
- This page is read-only; data cannot be changed here
- Action buttons are shown based on your account's permissions
💡 Tip: Every data change is recorded in "Edit History" for later tracing.
III. Related Features
| Feature | Description | Link |
|---|---|---|
| Product List | Browse and search all products | Go |
| Edit Product | Modify product data | Go |
| Create Product | Create a new product | Go |
| Label Templates | Manage the templates used to print product labels | Go |