Add Label Template
Contents
- 1. Features — Form fields / paper size / preview / steps
- 2. FAQ — 6 questions + notes
- 3. Related Features
1. Features
A label template decides what information each printed product label shows and the paper size. Here you create a new template: give it a recognizable name, pick the paper size, use the layout content to decide which fields the label shows (product name, SKU, barcode, etc.), and preview the print result live. The system pre-fills a default sample layout as a starting point, so you can modify from there rather than start from scratch. The template you create appears in the label template list, ready to choose when printing product labels.
Quick links: Form fields | Paper size | Preview & product data | Steps
1.1 Form Fields
Fields marked with * are required
| Field | How to fill | Notes |
|---|---|---|
| *Template Name | Give it a recognizable name with size and purpose (e.g. "Medium-Apparel") | Required |
| *Paper Size Type | Pick the label paper size from the list; choosing "Custom Size" requires entering width and height | Required, defaults to "Medium (70mm × 50mm)" |
| *Template Content | Decides which fields the label shows; you can use the provided sample layout and modify it | Required; layout syntax errors will block saving |
| Default | Tick to make this the template applied automatically when printing | Only one default per merchant; setting a new one clears the previous |
| Description | A note on the template's purpose for easy identification later | Optional |
1.2 Paper Size
Choose the label paper by product size and how much information you need to show:
| Size option | Width × Height | When to use |
|---|---|---|
| Small (40mm × 30mm) | 40mm × 30mm | Small items, jewelry |
| Medium (70mm × 50mm) | 70mm × 50mm | General products (system default) |
| Large (100mm × 70mm) | 100mm × 70mm | Large items, or when more info is needed |
| A4 (210mm × 297mm) | 210mm × 297mm | Product manuals, full info pages |
| A5 (148mm × 210mm) | 148mm × 210mm | Medium info pages |
| Custom Size | Custom width/height | For special-size label paper; width and height must be 1–999999 mm |
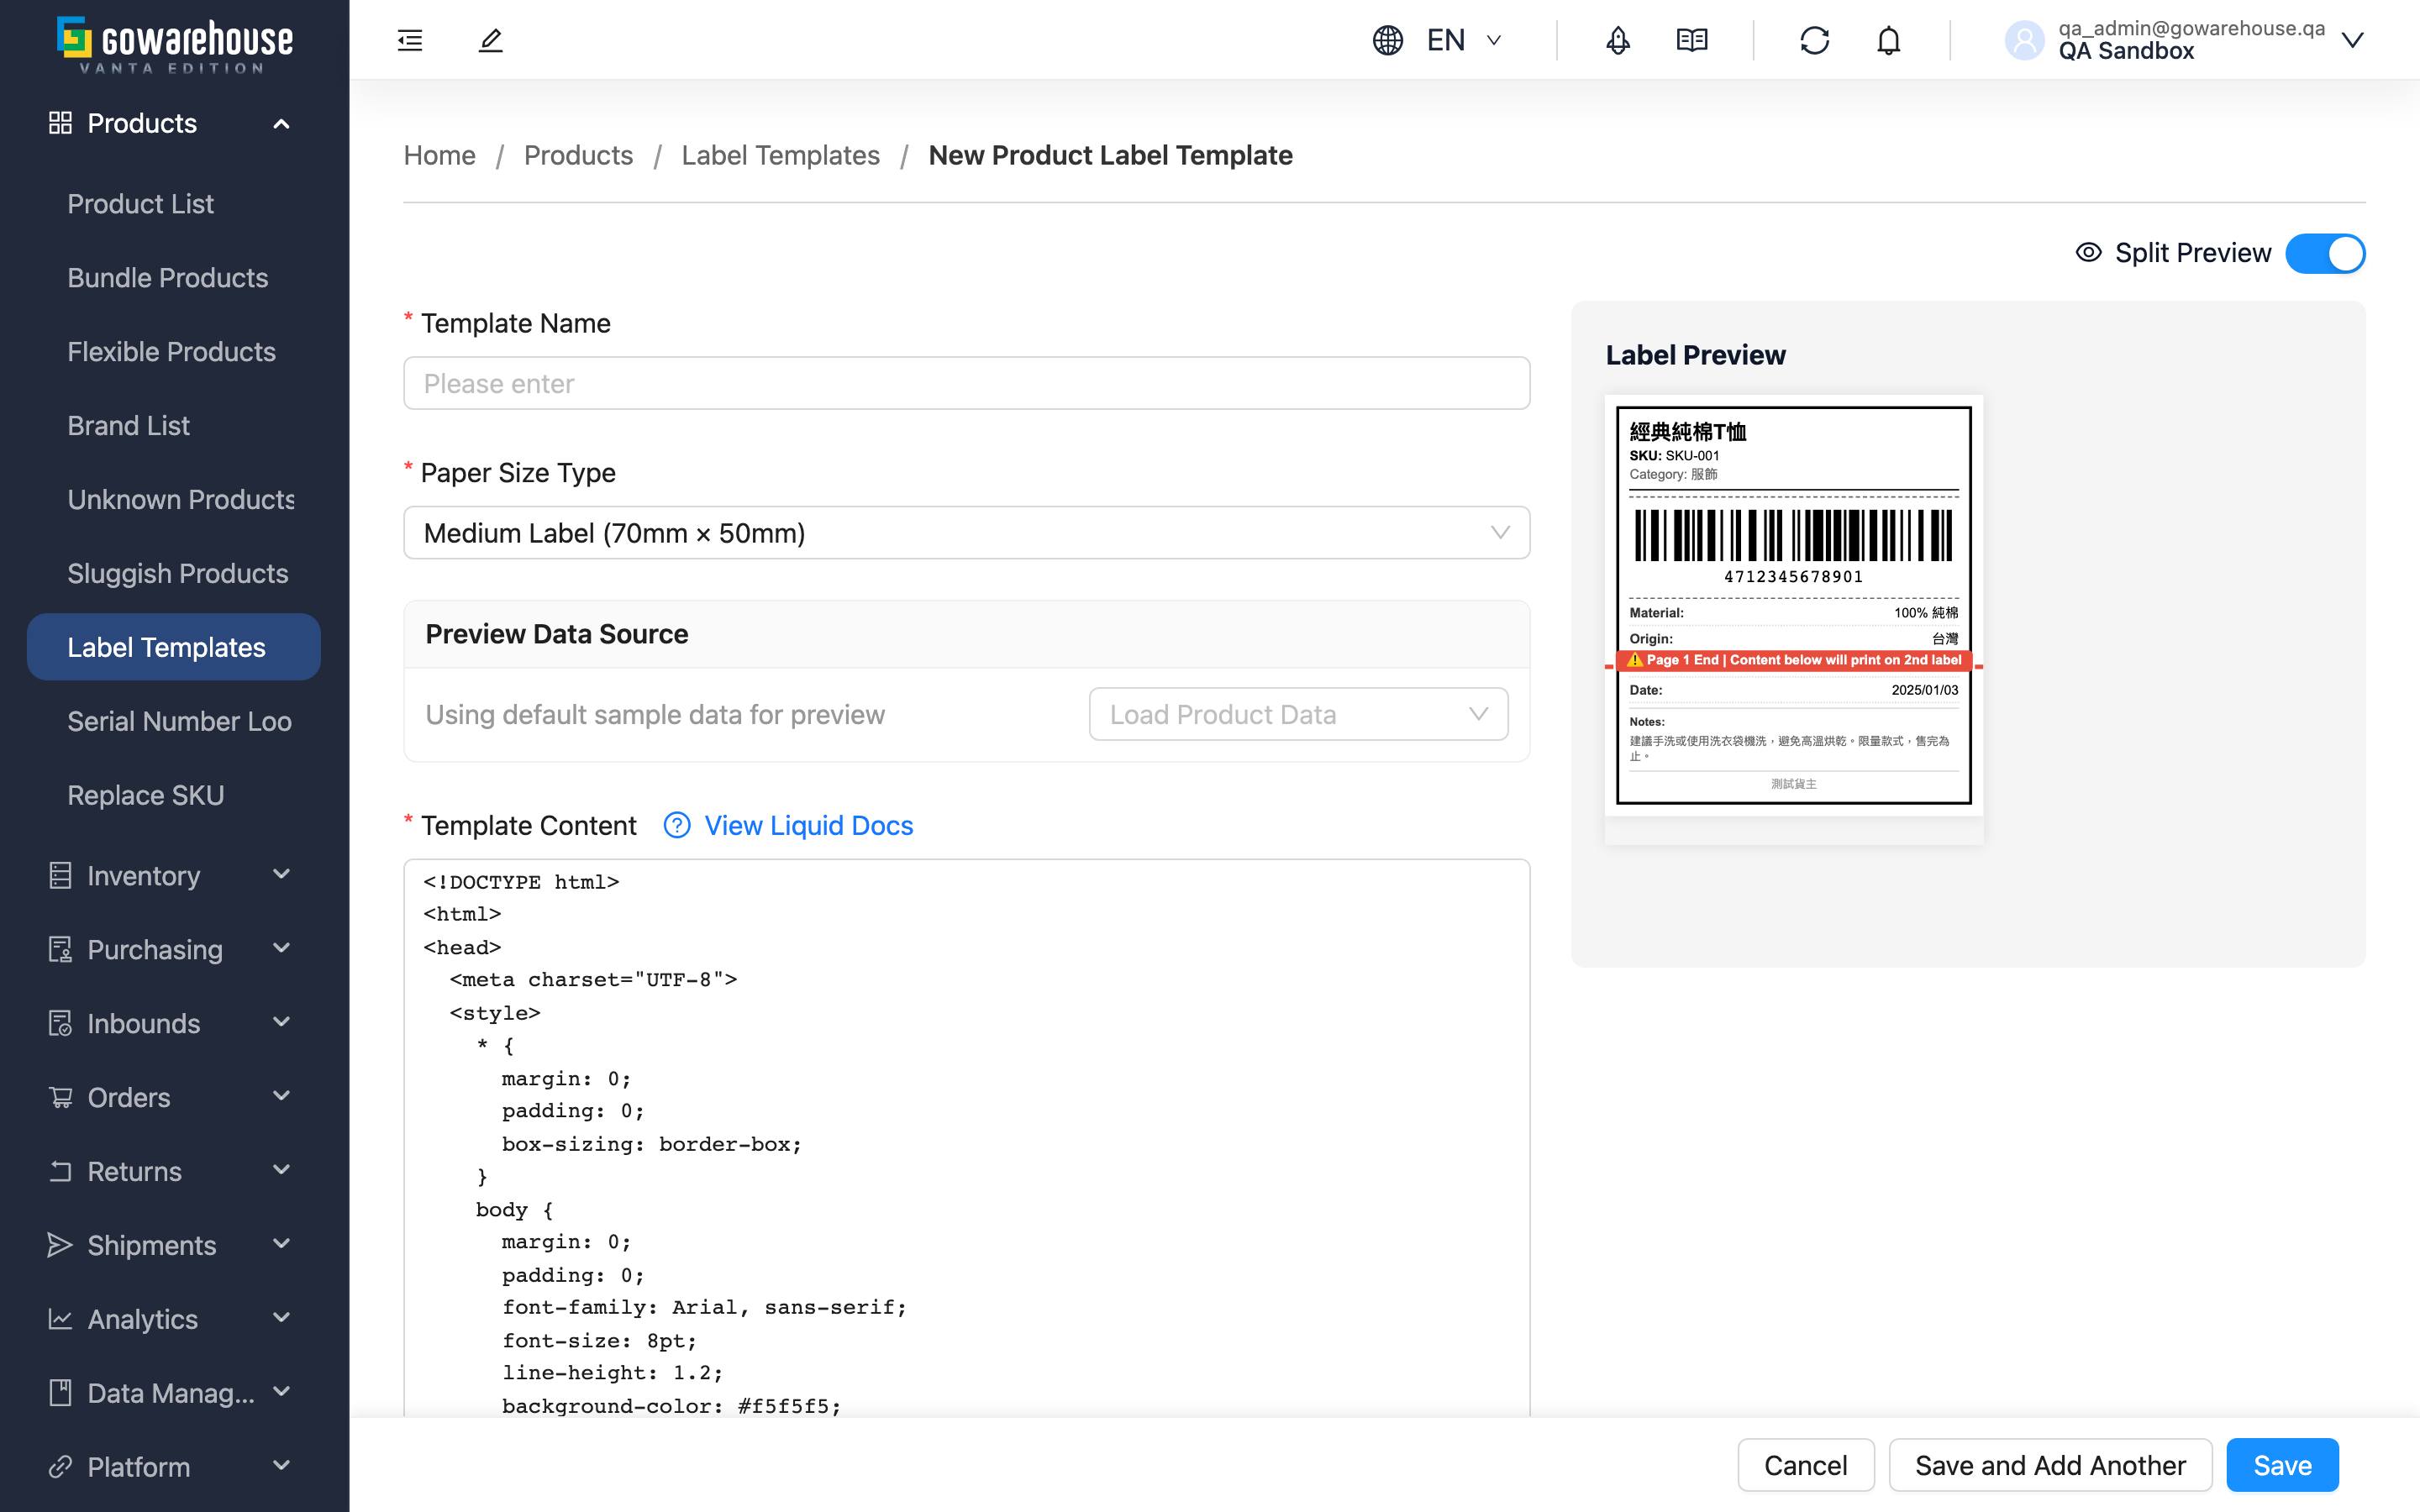
1.3 Preview & Product Data
A live preview sits on the right; the "Split Preview" toggle at the top-right shows or hides it, and you can click "Preview" for an enlarged view. By default it uses one sample product to show the result.
To confirm with a real product, choose an actual product under "Preview Data Source" to load it — the preview then uses that product's real data (name, barcode, material, etc.), matching the actual printed label; click "Reset to Sample Data" to switch back to sample data.
1.4 Steps
▸ Step 1: Fill basic info
- Enter the "Template Name"
- Choose the "Paper Size Type" (enter width and height if you pick "Custom Size")
▸ Step 2: Design the template content
- Start from the default sample layout the system fills in
- Add or remove the fields you want to show
▸ Step 3: Preview and confirm
- Use the live preview on the right, or click "Preview" to check the layout
- Confirm the info is complete and nothing exceeds the label's edges
- For a closer match to reality, load a real product under "Preview Data Source" to compare
▸ Step 4: Save
- Tick "Is Default" if needed
- Click "Save"; afterwards you land on the template's detail page
- 💡 Tip: To create several templates in a row, click "Save and Add Another" instead — after saving, the form clears and re-loads the default sample so you can create the next one right away
2. FAQ
2.1 FAQ
▪ Which fields are required?
"Template Name", "Paper Size Type", and "Template Content" are required. If you pick "Custom Size", width and height are also required and must be between 1 and 999999 mm.
▪ What if I don't know how to write the template content?
The system fills in a default sample layout you can use as-is or tweak field by field. Above the content area there's a "View Liquid Docs" link to refer to for advanced adjustments.
▪ I get an error on save and can't save it
The most common cause is a layout syntax error in the template content, which the system blocks with a prompt. Check against the format of the system's default sample layout, or restore the default sample content and modify step by step. The next causes are an empty required field or a custom size with width/height out of range.
▪ Will the preview match the actual print?
By default the preview uses one sample product. For a closer match, load a real product under "Preview Data Source" — the preview then uses that product's real data, matching the printed result.
▪ If I set a new template as default, what happens to the old default?
The previous default is cleared automatically, because each merchant can have only one default template. Leaving "Is Default" unticked makes this template an alternative only — you'd pick it manually when printing.
▪ Can I edit it after creating?
Yes. After saving you land on the detail page; click "Edit" to adjust any field.
2.2 Notes
⚠️ Important
- Each merchant can have only one default template; setting a new template as default clears the previous one.
- Custom-size width and height must be between 1 and 999999 mm.
💡 Tip: Preview the layout before saving to avoid finding fields running past the label edges or missing information only after printing.
3. Related Features
| Feature | Description | Link |
|---|---|---|
| Label Templates list | Manage all label templates | Go |
| Products | Manage product data; also the entry point for printing product labels | Go |