
User Management
Table of Contents
1. Scenarios
Quick Links: A new colleague takes over back-office work | An employee leaves or hands over | Control access by job role
Scenario 1: A new colleague takes over back-office work
Situation: You hired a new customer-service rep who needs to check orders and handle returns, but you don't want to share your own account and password.
Use this feature: Use Invite User to generate an invitation link and send it to her, specifying the permissions she needs (for example, orders and returns only) right in the invitation.
Result: She sets her own password and joins; after logging in she sees only the functions you granted, and every action is recorded under each person's own account.
Scenario 2: An employee leaves or hands over
Situation: The colleague handling shipping reconciliation leaves next week and the successor hasn't started yet; you need to make sure the account can no longer access the system after departure.
Use this feature: In the user list, disable the account — all logged-in devices are signed out immediately, and no further logins are possible.
Result: The account and its activity records are kept; when the successor arrives you can re-enable the same account or invite a new one.
Scenario 3: Control access by job role
Situation: Your accountant only needs bills, marketing only needs products and inventory, and you don't want everyone able to change orders or touch integration settings.
Use this feature: Prepare a permission template per job role (such as "Accounting", "Marketing") and apply it when inviting or adjusting permissions; fine-tune individual items in Edit User.
Result: Each person gets only the permissions their job needs; after a permission change the person must log in again, and the new permissions take effect immediately.
2. Features
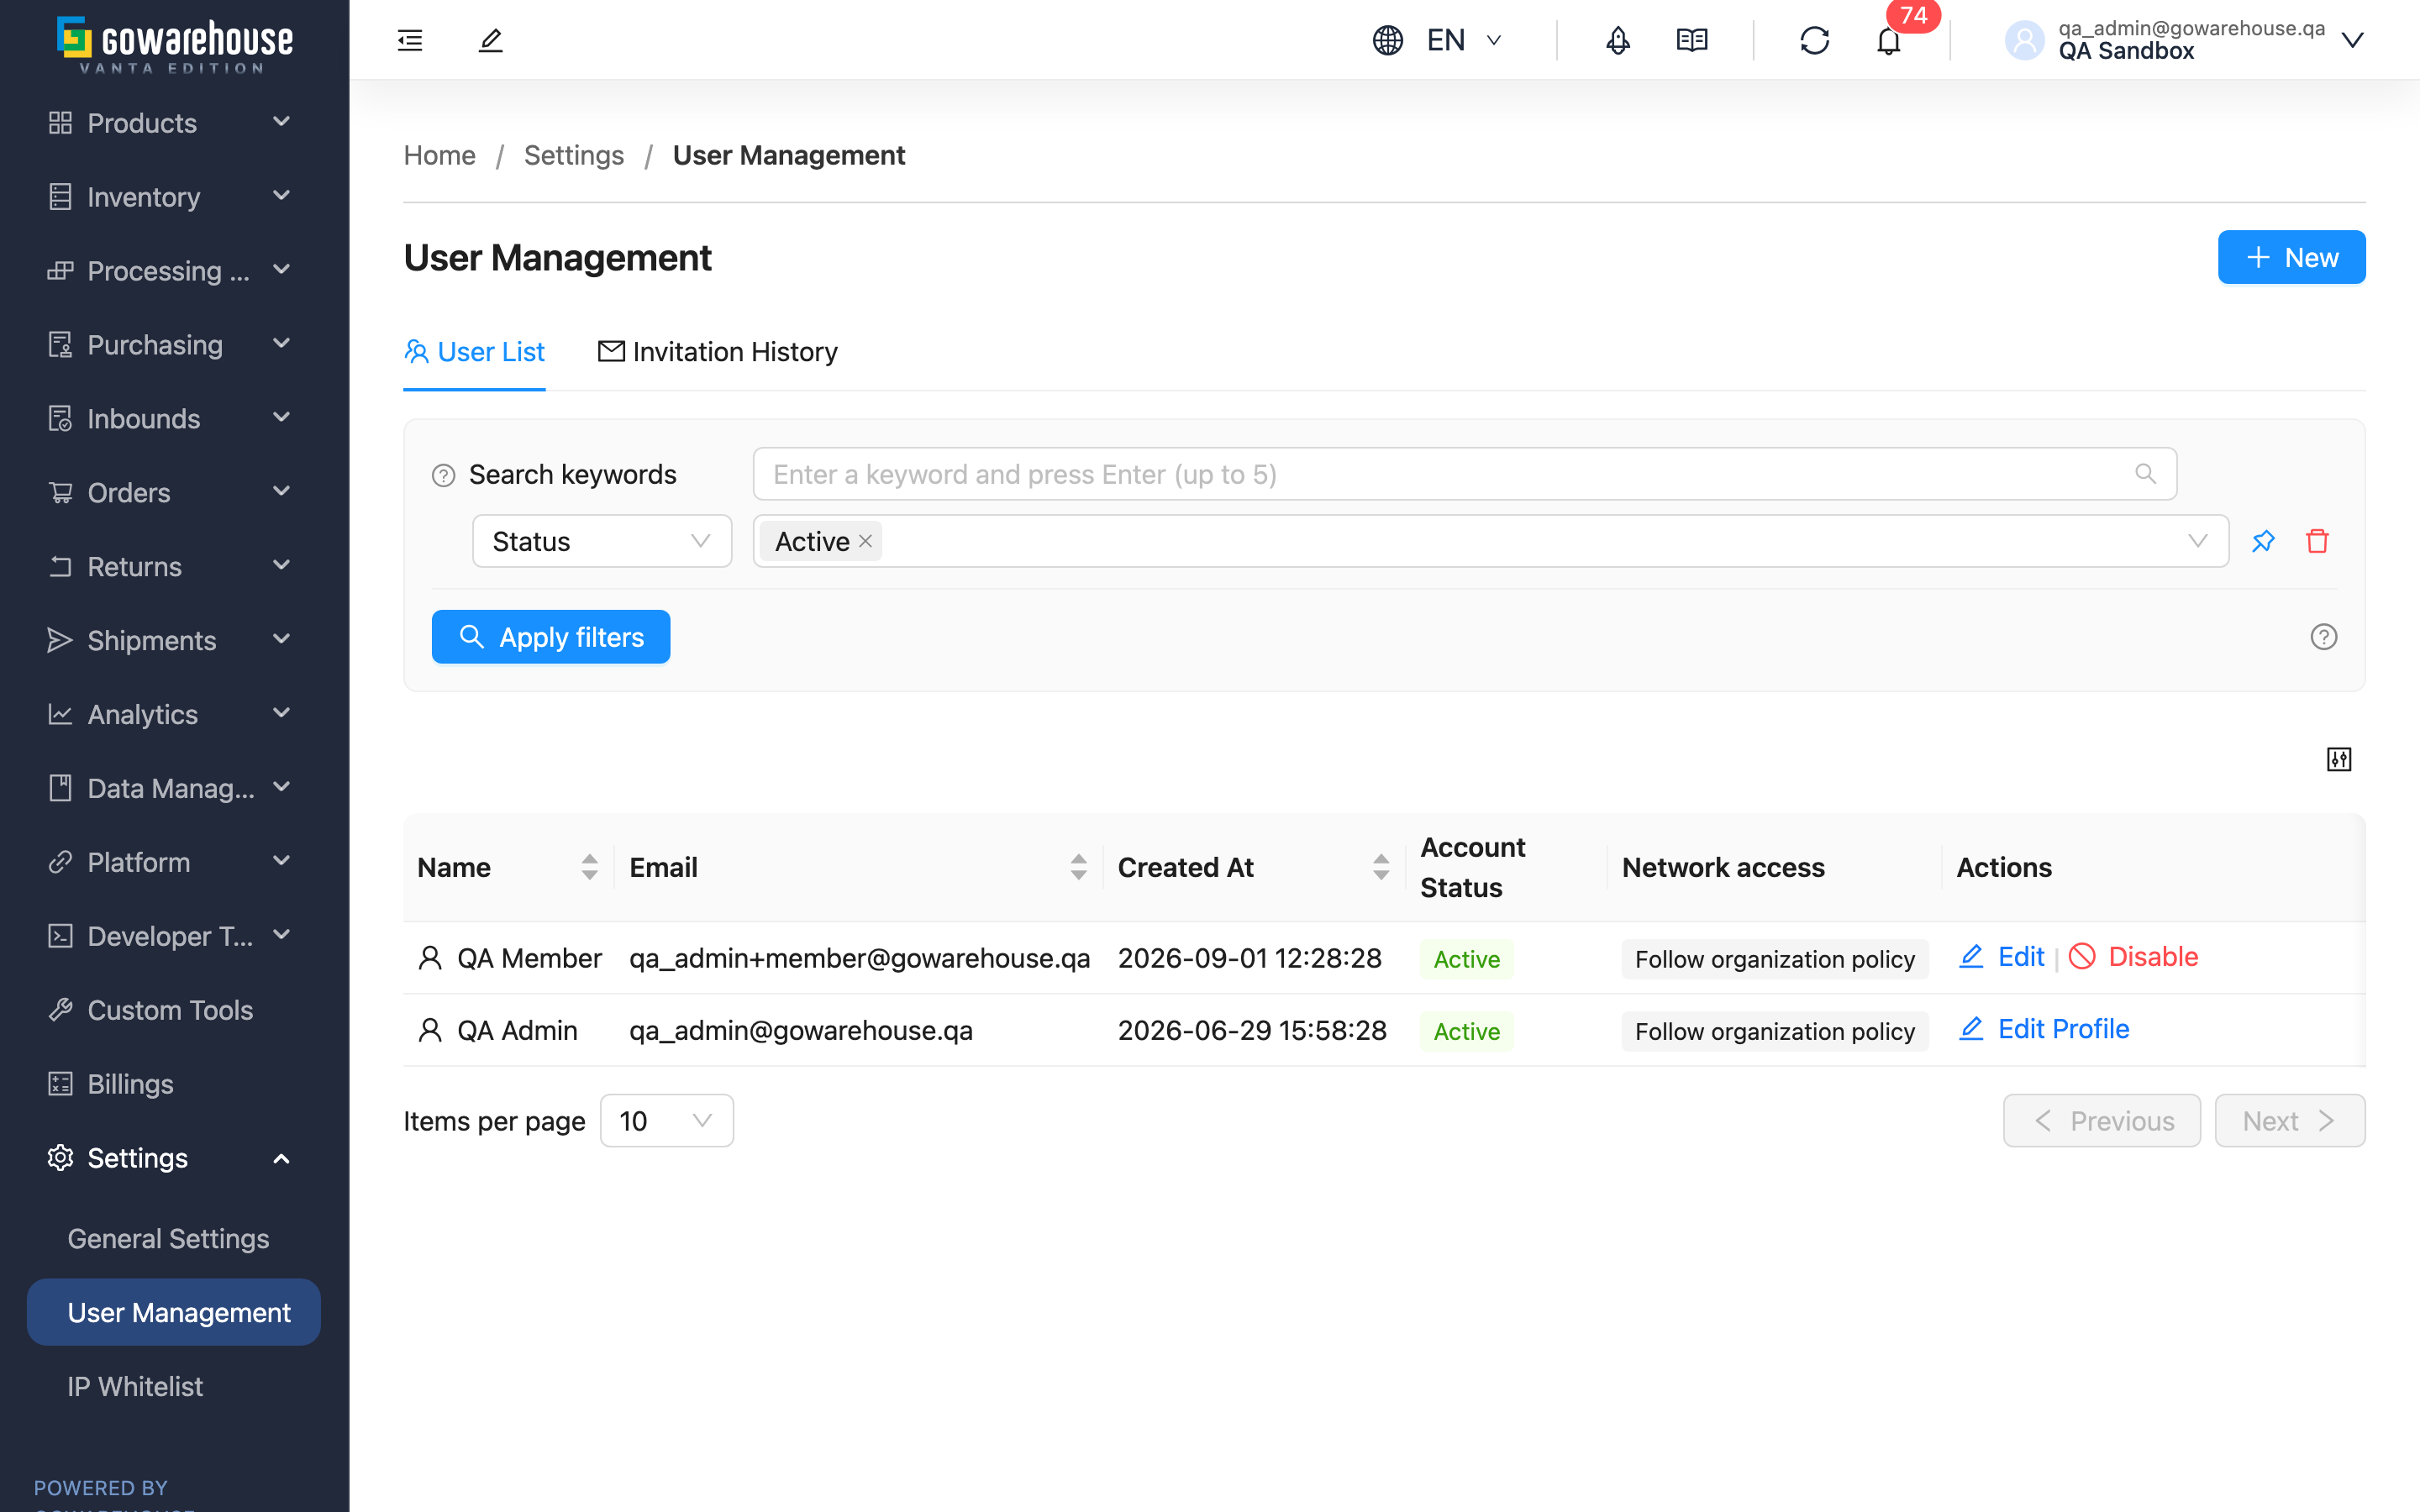
User Management is where you maintain the login accounts of your back office, under "Settings > User Management". You can invite new users, set what each person can use, and disable accounts when people change. The page has two tabs, "User List" and "Invitation History": the former lists members who have joined, the latter tracks invitations you have sent.
Quick Jump: User list | Invite user | Invitations | Disable and enable
2.1 User list
The "User List" tab lists all users of this account. Search by name or Email keyword; the "Status" filter shows only "Active" accounts by default — add "Disabled" to the filter to find disabled accounts.
Row actions:
| Action | Description |
|---|---|
| Edit | Open Edit User to view account info and adjust permissions |
| Disable/Enable | Disable or re-enable the account, see Disable and enable |
| Edit Profile | Appears only on your own row — your own data is edited on the profile page; you cannot edit or disable yourself here |
The edit and disable buttons only appear if you hold the user-management write permission.
2.2 Invite user
Click "New" at the top right to open the "Invite User" dialog.
Fields marked with * are required
| Field | How to fill | Notes |
|---|---|---|
| Enter the invitee's email | If the email already has a pending invitation, or is already a user of this account, the invitation cannot be sent | |
| Permission template | Choose a saved permission set | An invitation must carry at least one permission; if the template contains items beyond your own permissions, the system trims it to what you can grant and tells you |
After submitting, the system generates an invitation link — copy it yourself and send it through any channel (email, messaging apps); the system does not send the invitation email for you. Once the invitee opens the link and sets a password, they become a member with exactly the permissions you specified.
About this action:
- Prerequisites: user-management write permission; you can only grant permissions you hold.
- Side effects: the link is valid for 48 hours from creation, and anyone holding it can register with it — send it only to the invitee.
- Reversibility: before it is accepted, you can cancel the invitation or regenerate the link anytime in Invitations.
2.3 Invitations
The "Invitation History" tab tracks each invitation's status:
| Status | Meaning |
|---|---|
| Pending | Link generated, invitee has not finished registration, still within the 48-hour window |
| Accepted | The invitee has set a password and joined; they appear in the "User List" tab |
| Expired | Not accepted within 48 hours; the link no longer works |
| Canceled | The invitation was canceled |
A pending invitation supports "Copy Link" to resend, "Regenerate" (the old link stops working immediately and the 48-hour window restarts — use this if the link leaked), and "Cancel Invitation". Accepted invitations cannot be canceled or regenerated.
2.4 Disable and enable
Disabling is how you withdraw access when people change:
- Side effects: on confirmation, the user is signed out of all devices immediately and can no longer log in; the account and its past activity records are fully kept.
- Reversibility: click "Enable" anytime to restore access; permissions stay as they were before disabling.
- Limitations: you cannot disable yourself — to avoid locking yourself out; ask another person with user-management permission to do it.
3. FAQ
3.1 FAQ
▪ Does the invitation email the person automatically?
No. The system only generates an invitation link; you copy and send it yourself. Both the dialog after submitting and "Copy Link" in the invitations tab give you the link.
▪ The invitation link expired — what now?
In Invitations, click "Regenerate" on that invitation. A new link is generated with a fresh 48-hour window; send it again — no need to re-enter the invitation.
▪ Why can't I send the invitation?
The two most common causes: the email already has a pending invitation (cancel the old one first), or the email is already a user of this account. Also, an invitation must include at least one permission template — an invitation with no permissions is rejected.
▪ Can I reset a colleague's password?
No. For account security, you cannot set someone else's password here; ask them to use "Forgot password" on the login page to reset it via their own email.
▪ After disabling an account, do their records disappear?
No. Disabling only blocks login; past orders and activity records are kept, and re-enabling restores the account with its previous permissions.
▪ Can't find a user?
The "Status" filter shows only active accounts by default — if the person was disabled, add "Disabled" to the filter and they will appear.
3.2 Notices
⚠️ Important
- Disabling an account signs the person out of all devices immediately — make sure no work in progress is affected before confirming.
- Anyone holding the invitation link can register with it — send it only to the invitee; if you suspect a leak, "Regenerate" at once to kill the old link.
- You can only grant permissions you hold; anything beyond that in a template is trimmed automatically.
💡 Tip: Build permission templates for common job roles first (you can save templates in the permissions section of Edit User); inviting new people then takes one template pick instead of checking items one by one.
4. Related Features
| Feature | Description | Link |
|---|---|---|
| Edit User | Adjust a single user's permissions, with a reference for every permission item | Go |
| Welcome | Overview of back-office features | Go |