New Import Template
Table of Contents
1. Features
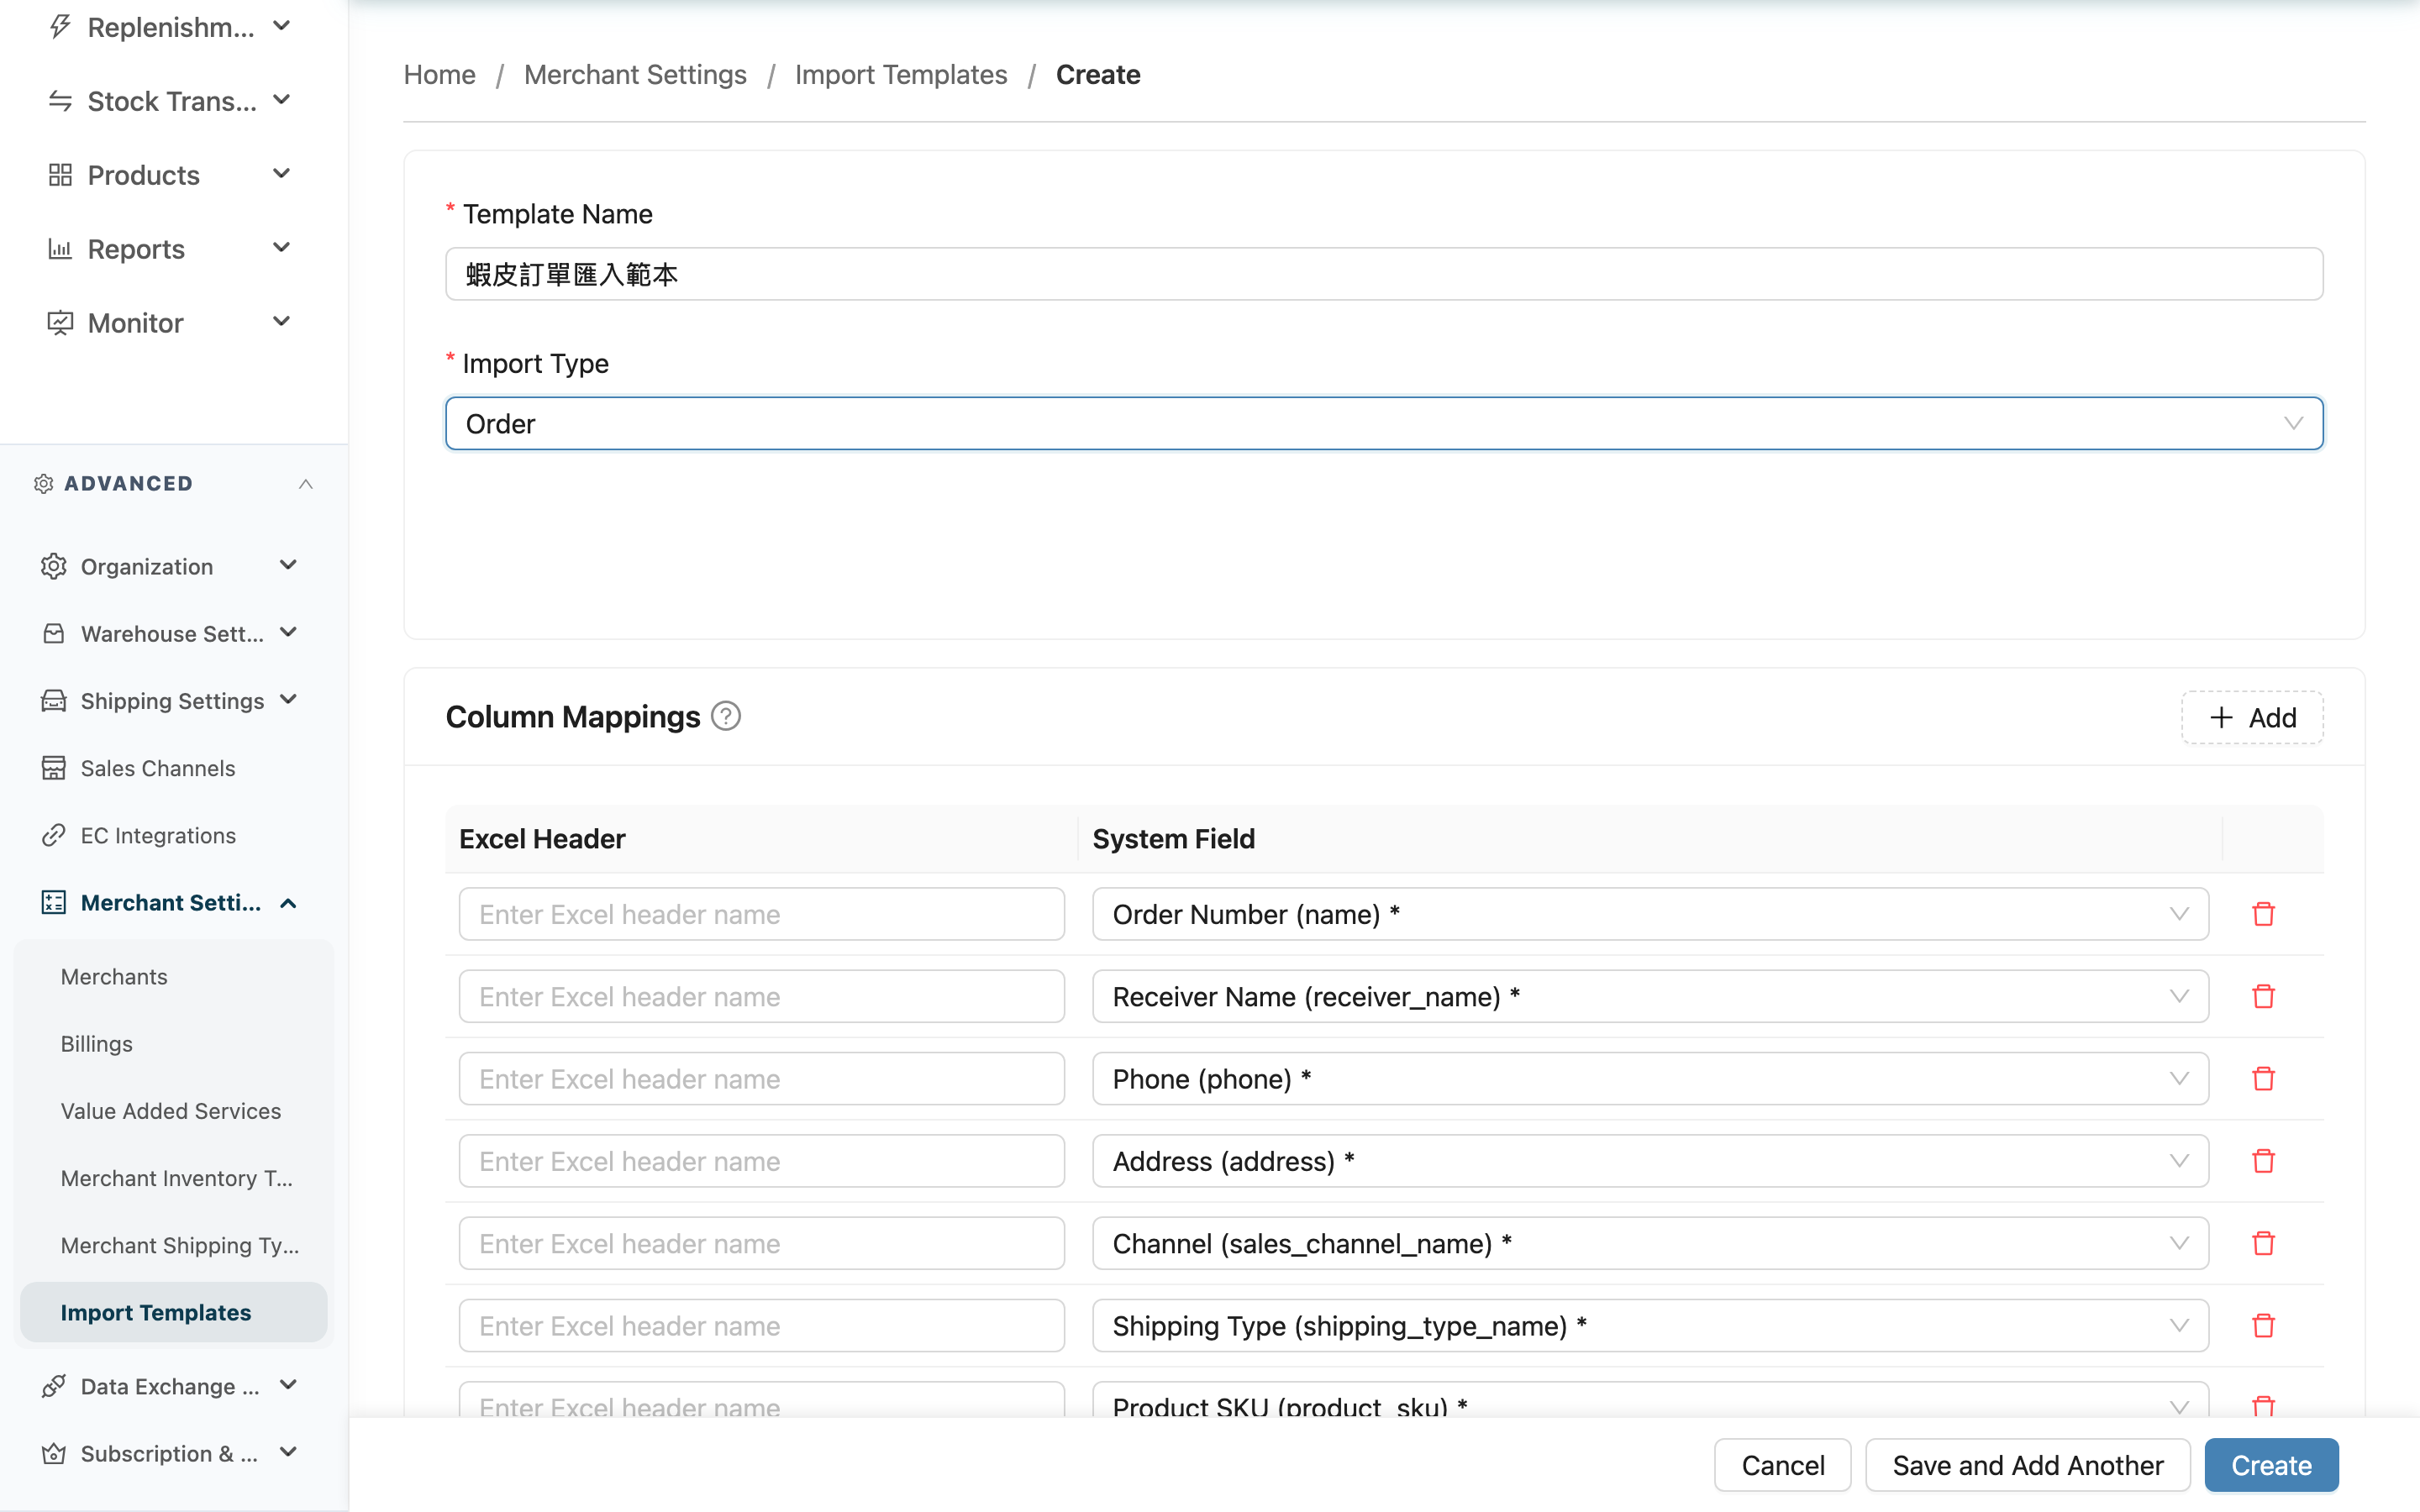
This page is for building a new import template: first choose which merchant the template belongs to and pick the import type, then map the merchant file's headers to system fields one by one, and optionally set a fixed default value for some fields. Once built, when this merchant imports a file in the same format, selecting the template reads the columns into the right places automatically.
Quick Jump: Select Merchant | Basic Info | Column Mappings | Default Values | Save
1.1 Select Merchant
When you open the new page, you first choose which merchant the template belongs to. A template is bound to a single merchant and can only be used for that merchant's imports; the system fields available for mapping also depend on this merchant (e.g. the merchant's custom attribute fields). After choosing the merchant, you proceed to the form below.
1.2 Basic Info
Fields marked with * are required
| Field | How to fill | Notes |
|---|---|---|
| *Template Name | Enter a recognizable template name; ideally include the merchant and purpose, e.g. "Merchant A - Monthly Orders" | Required |
| *Import Type | Choose the import type this template applies to | Required. Options: Order, Product, Inbound, Return Order, Contact Address, Bundle; the field options below switch with your choice, and the type cannot be changed after creation |
1.3 Column Mappings
After choosing the import type, the "Column Mappings" section below shows a mapping table; each row is one mapping:
| Field | How to fill | Notes |
|---|---|---|
| Excel Header | Enter the header name in the merchant's file; it must exactly match the file (including spaces and case) | A row left blank will not be saved |
| System Field | Choose the system field this header maps to from the list; type a keyword to search | Each system field can be mapped only once; fields already taken by another row or by a default value won't appear in the list |
After choosing the import type, the system automatically lists the required fields for that type as a few rows (system field pre-selected, header left blank to fill). Click Add at the top-right to add more mapping rows; the delete button on the right of each row removes the whole row.
1.4 Default Values
If some fields use the same fixed value across the whole batch, set them in this section to be filled in automatically at import:
| Field | How to fill | Notes |
|---|---|---|
| Field Name | Choose the system field to set a fixed value for | A field with a default value is automatically removed from the column mappings above — the default takes precedence and needs no, and cannot have, a header mapping |
| Default Value | Enter or choose the fixed value to fill in | Depending on the field type, this may be a text input, a number input, or a dropdown |
There are no default values to begin with; click Add to add one.
1.5 Save
When done, the bottom of the page offers two save options:
- Create: Create the template and go to its detail page.
- Save and Add Another: Create it and stay on the new page with a cleared form, convenient for building multiple templates for the same merchant in a row.
On save, the system checks that every required field has a matching header or a default value; if any is missing, it tells you which fields are missing and does not save. If the type has no required fields, then at least one valid column mapping is needed.
2. FAQ
2.1 FAQ
▪ Why did picking an import type add a few mapping rows automatically?
Those are the required fields for that import type. The system pre-selects the system field and leaves the header blank, reminding you that every required field must be mapped to a header (or set as a default value), otherwise the import will fail.
▪ I can't find the field I want in the system field list?
Confirm you picked the right import type (different types have different fields), and whether the field is already taken by another row or a default value (each field can be used only once). The merchant's custom attribute fields also appear in the list depending on the selected merchant.
▪ Can one system field map to two headers?
No. Each system field can be mapped only once; a field already taken won't appear in the other rows' lists.
▪ Why did a field with a default value disappear from the column mappings?
Because the default value takes precedence: once a default value is set, the fixed value is filled in automatically and there's no — and cannot be — a header mapping, so the field is removed from above automatically. Delete the default value or change it to another field, and the original field (if required) is added back to the column mappings automatically.
▪ Save says "Missing required fields" — what do I do?
It means a required field has neither a header mapping nor a default value. Per the prompt, add a matching Excel Header for it, or set a default value, then save.
▪ I can't see the new button or get into this page?
Creating an import template requires merchant write permission. If you can't see it, contact your administrator to confirm your permissions.
2.2 Notes
⚠️ Important
- The import type and owning merchant are locked after creation and cannot be changed later; if you pick wrong, you can only delete and rebuild.
- Switching the import type clears the default values and column mappings you've filled in (fields are bound to a specific type, so old settings won't match after switching). Decide on the type before mapping fields.
💡 Tip: Make sure the Excel Header matches the merchant file's header exactly, including spaces and case, or the import won't match and that field will read no value.
3. Related Features
| Feature | Description | Link |
|---|---|---|
| Import Template List | Back to the list of all templates | Go |
| Edit Import Template | Modify the template after creation | Go |
| Import Products | Select a template when importing products | Go |
| Import Orders | Select a template when importing orders | Go |